Business card exchange table
A virtual table for exchanging business cards online, allowing multiple people to exchange business cards at the same time.
Exchange business cards
It is an explanation of the procedure for exchanging business cards using the business card exchange table.
The business card exchange table is divided into the host side (organizer side) and the guest side (invite side).
1.Prepare a business card exchange table
To prepare a business card exchange table, "reserve" from the meeting group.
(Click here for reservation procedure.)
When you reserve a business card exchange table, you will be issued a URL and guest ID / meeting password to access the table.
2.Login
Access the issued URL and move to the login screen of the business card exchange table.

Log in to the host side
Cards R users who belong to the meeting group log in to the "host side". To log in to the host, enter the following information on the login screen and click the [Login] button.
| User Name | Email address registered as a user in Cards R |
|---|---|
| Meeting password | Meeting password issued at the time of "reservation" |
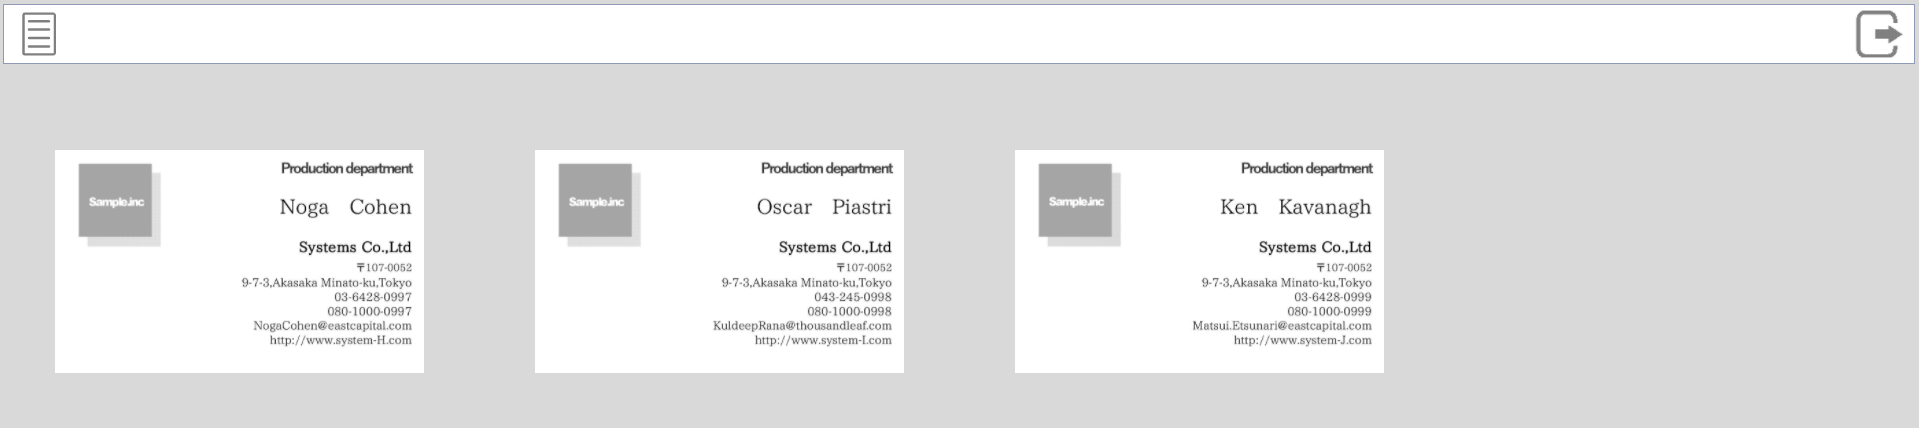
When you log in, your business card image set in the online business card will be automatically displayed in the guest table.
* If not set, it will not be displayed.
Click here for how to set up an online business card.
Log in to the guest side
The guest user logs in to the "guest side". To log in to the guest side, enter the following information on the login screen and click the [Login] button.
| User Name | Guest ID issued at the time of "reservation" |
|---|---|
| Meeting password | Meeting password issued at the time of "reservation" |
Caution Restrictions
- You can access the business card exchange table only from 30 minutes before the reservation time to the end.
- The maximum number of people who can log in at the same time is 10 on both the host side and the guest side.
- The guest side logs in with the same guest ID, but if you log in separately, it will be counted as a different person.
- Only Cards R users who belong to the meeting group can log in to the host-side table.
3.Host user gets guest user's business card
Business cards uploaded in the guest table will be displayed in the host table and automatically registered in Cards R.
Upload procedure
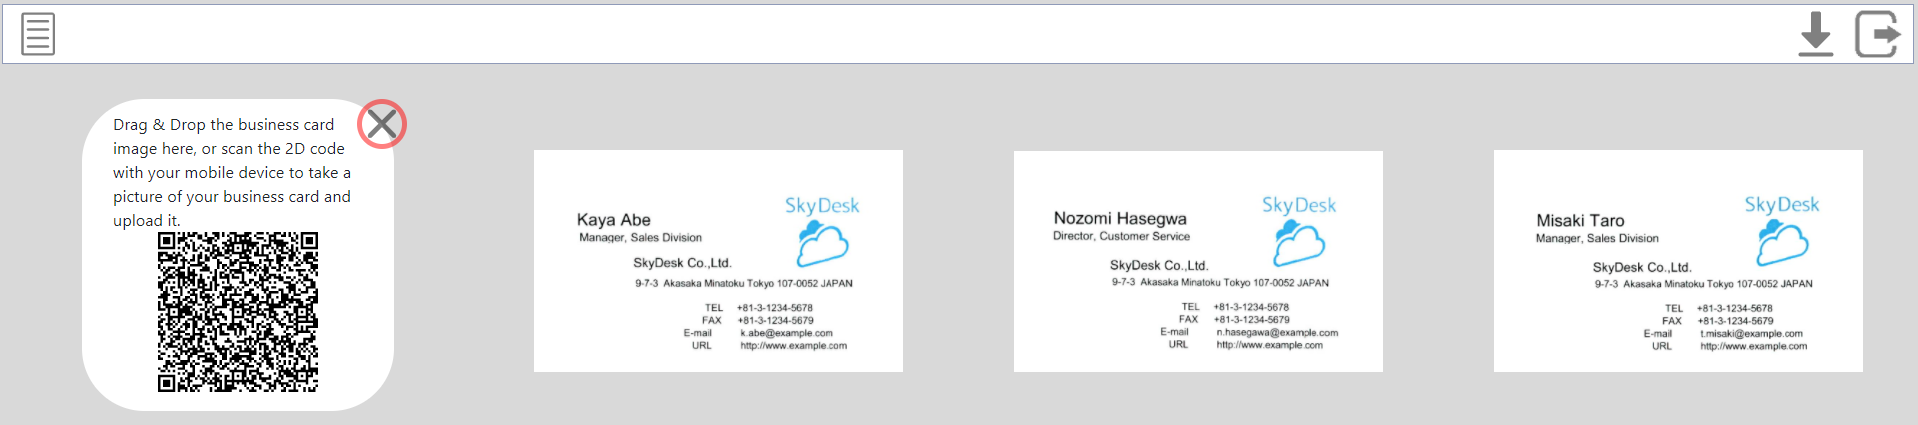
Upload by drag & drop
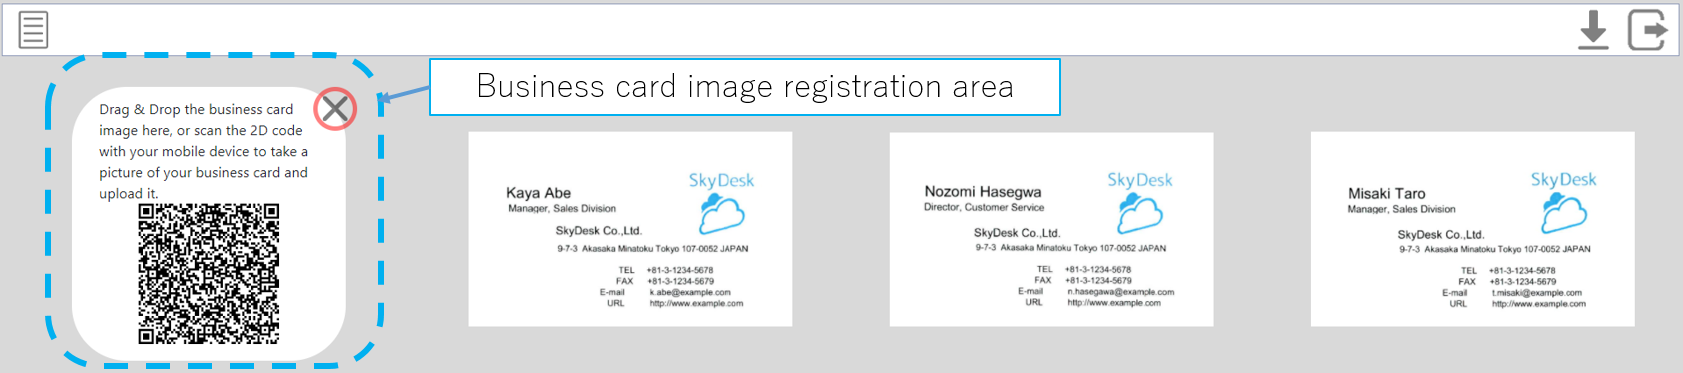
- Drag and drop the business card image to be uploaded to the "business card image registration area" on the upper left of the guest table.
The uploaded card image is displayed in the host table.(Check the business card displayed to the other side)
Upload on your smartphone
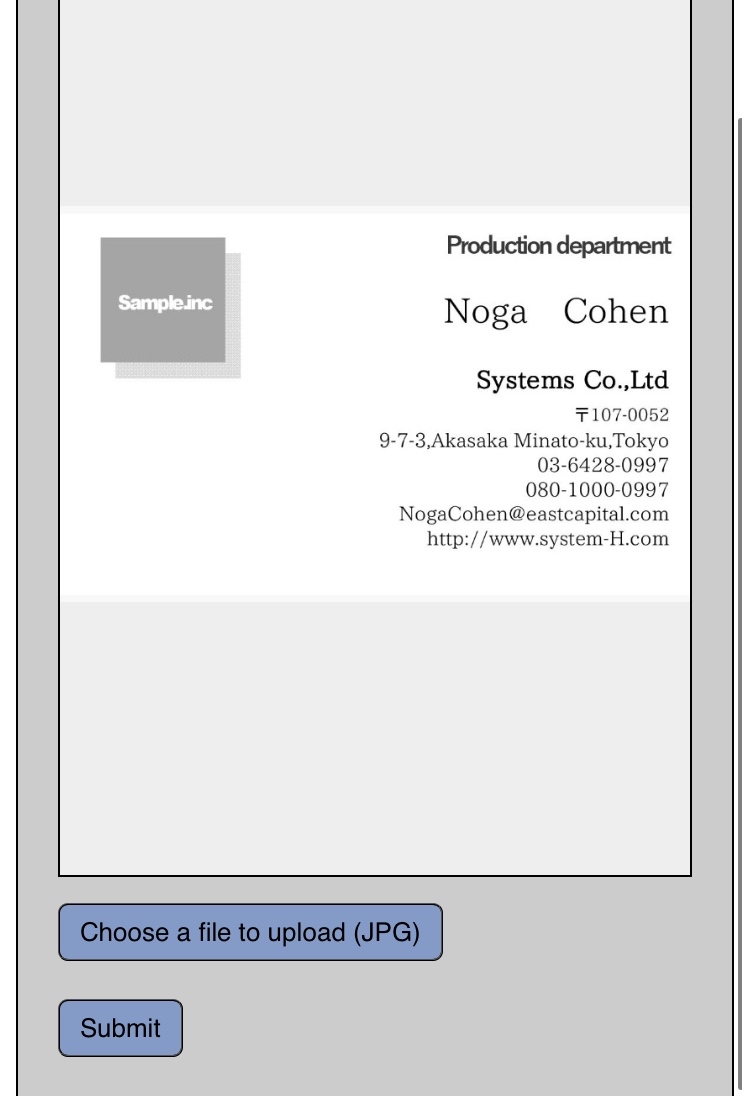
- Read the 2D code of the "business card image registration area" with your smartphone to access the business card image registration screen.
- Tap [Choose a file to upload (JPG)].
- A menu for [Shoot with camera, select business card image file] is displayed. Specify the business card image by either method.
(Menu notation depends on the browser.) - After specifying the business card image, tap [Submit] to upload it.
-
The uploaded business card will be registered as a contact for the meeting group and will be owned by all users who belong to the meeting group at that time.
Click here for how to check the contacts registered in the meeting group. - When you upload a new business card image again, the business card image displayed in the table on the host side will be updated with the new business card image.
However, if you log in again in another window and upload the business card image, it will be considered as a different person and a new business card image will be added. - You can hide the "Business card image registration area" by clicking the
 button on the upper right of the "Business card image registration area".
Caution Restrictions
- The supported image format is JPEG only.
- If the image size exceeds 4 Mbytes, the image is compressed to 4 Mbytes or less and registered.
- Once the "business card image registration area" is hidden, it cannot be displayed again.
4.Guest user gets host user's business card
The guest user downloads the host user's business card image at the guest's table.
Download procedure
- Click the business card image to download to select it.
(If you want to download multiple cards at the same time, hold down the control key (option key on Mac) and select the business card image.) - Click the download button in the upper right.
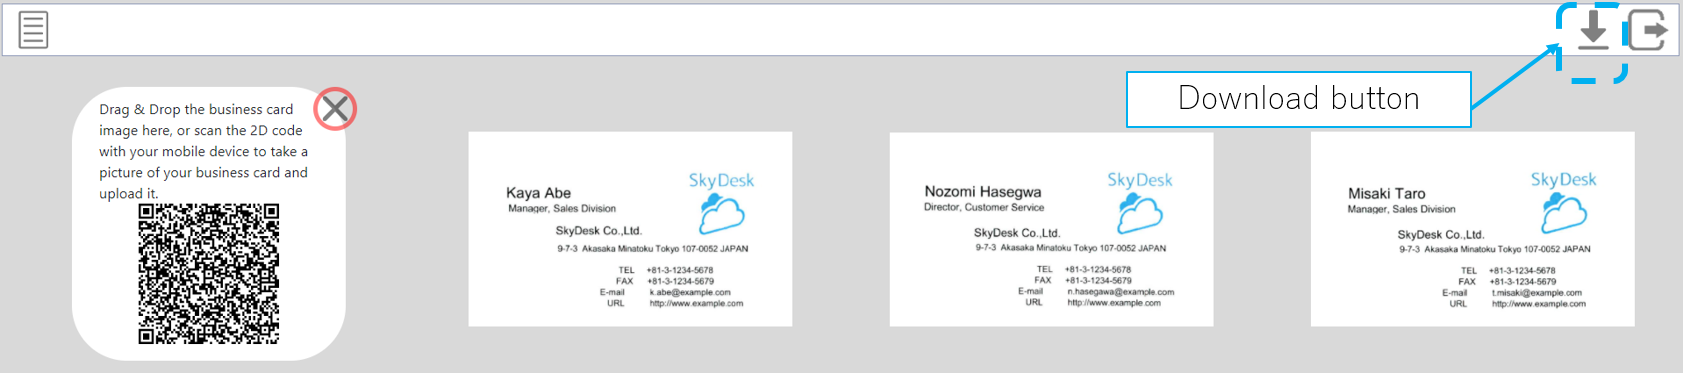
Caution Restrictions
- If you download multiple cards at the same time, the selected business card images will be downloaded together in a ZIP file.
Other common functions
This is a description of the functions that are commonly provided in both the host side and guest side tables.
Enlarge the displayed business card image
Double-click the business card image to enlarge it.

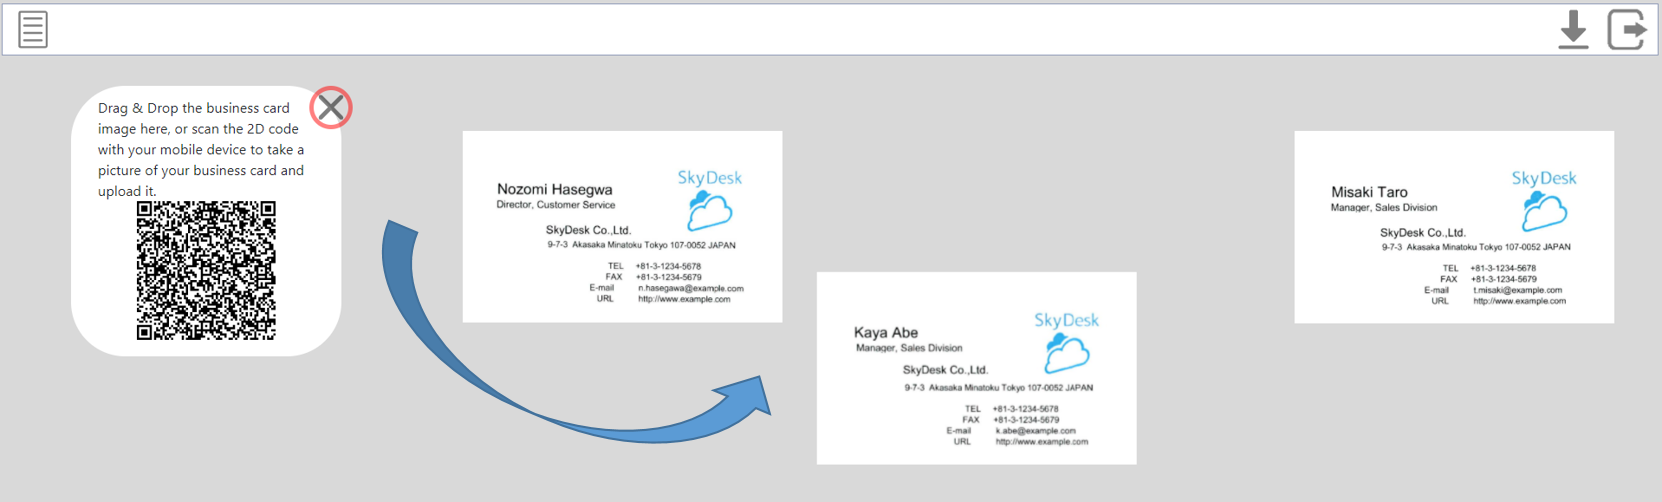
Sort the displayed business card images
When you drag and move the business card image, the business card image is inserted at the moved position and the display order is changed.
(Changes in display order apply only to your browser.)
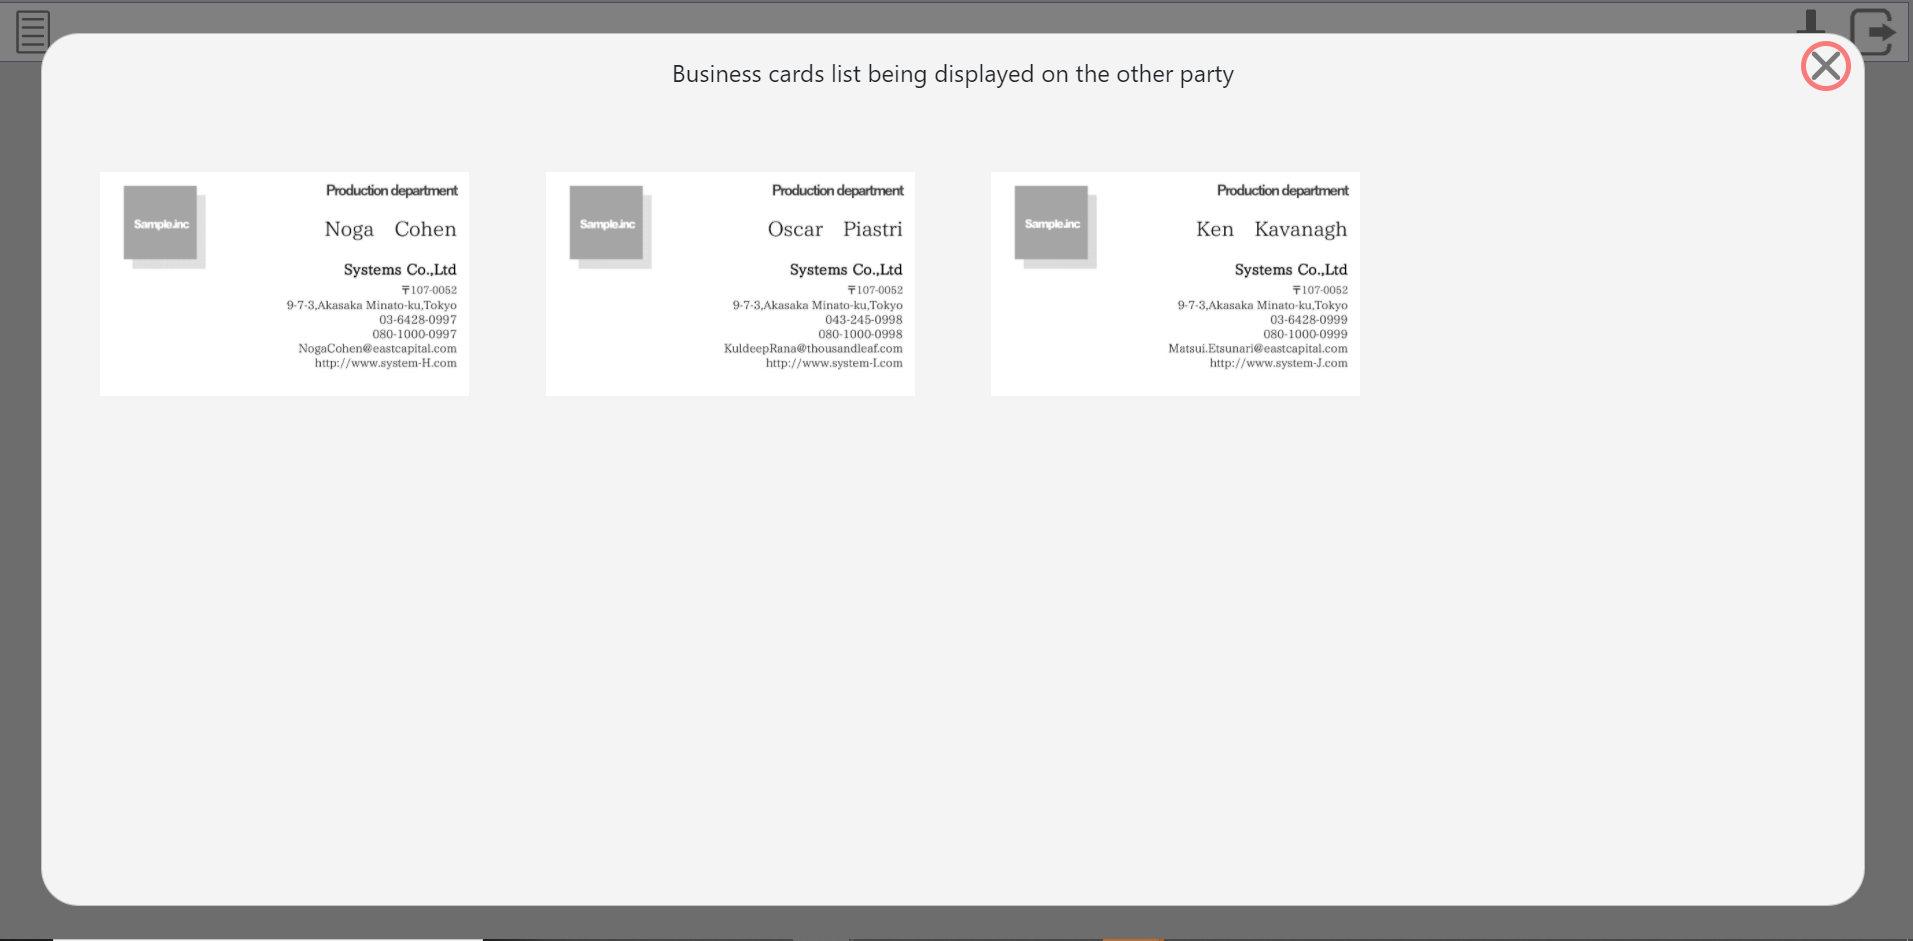
Check the business card displayed to the other side
You can check the business card image displayed on the other side table.
Procedure
- Click the
 button on the upper left
- The list of business card images displayed on the other side is displayed.
- Click the button on the upper right to close
Log out
Click the logout button in the upper right to log out.
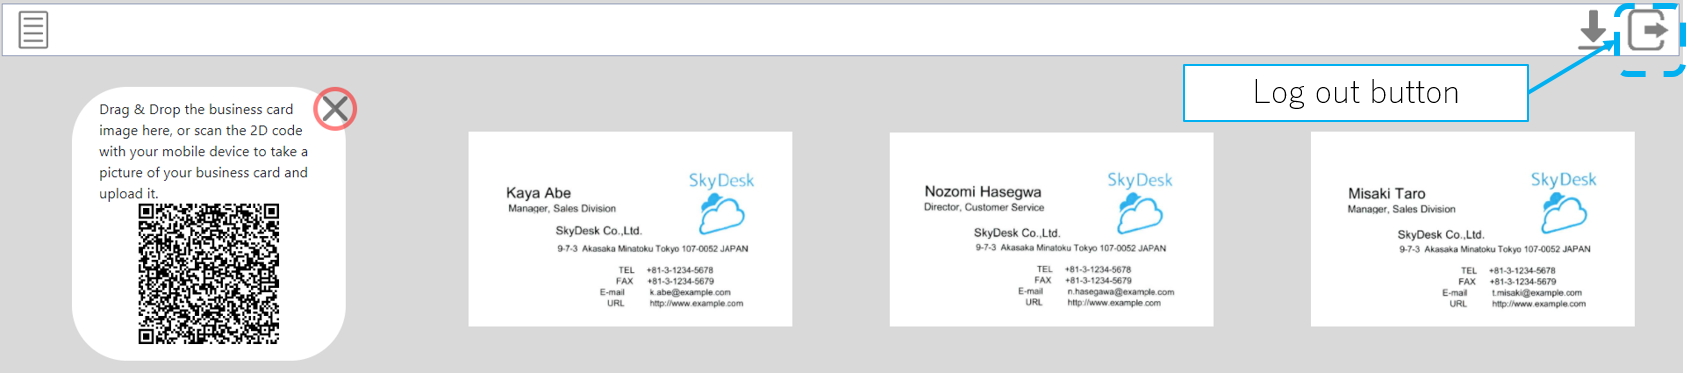
Caution Restrictions
- If you close the browser without logging out, you will be forced to log out after about 3 minutes.
- Up to 10 business card images can be displayed on the business card exchange table.
Even if the user logs out, the business card image of the business card exchange table will continue to be displayed. - If the number of guest tables has already exceeded the number that can be displayed, no more business card images will be displayed even if the user logs in to the host side.
- New guest users will not be able to upload business card images if the host table has already exceeded the number that can be displayed.